
Open Design: The FREE Open-Source Claude Design Alternative
Based on Code A Program's demo: build a full AI-writing-tool landing page in Open Design — pick a coding agent (even a free one), prompt the design, refine it with on-canvas edits, then export or one-click deploy to Vercel or Cloudflare.
Open Design takes an idea and turns it into prototypes, websites, slides, and even HTML videos — all running locally on your own machine. In this demo, Code A Program installs the desktop app, connects a coding agent, and builds a premium landing page for an AI writing tool called Draft, then refines and deploys it without leaving the workspace. Watch the full run in Code A Program’s video, or follow the written walkthrough below.
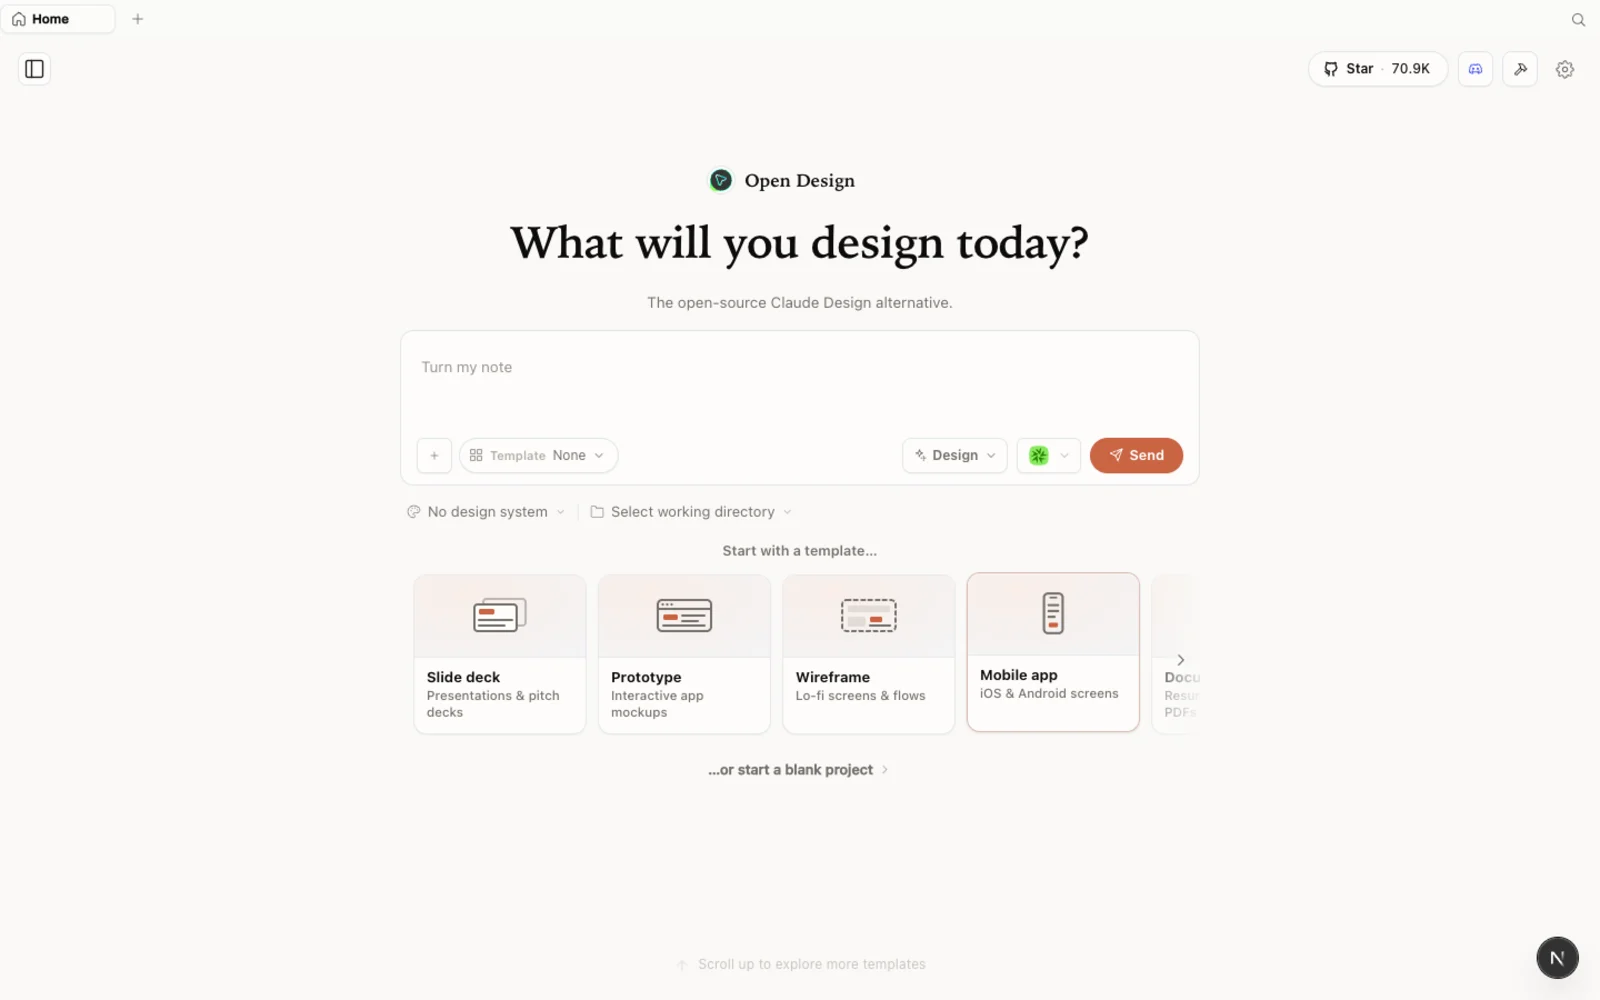 Open Design running locally: an open-source, agent-native design workspace you fully control — not locked to a single model.
What is Open Design?
Open Design is an open-source, local-first design platform — a free alternative to Claude Design and Figma. Instead of tying you to one model provider, it runs on top of the coding agent you already use, so you bring your own agent and your own key.
- Open source, Apache-2.0 — read every line, self-host it, or just download the desktop app.
- Runs locally — projects live in your own folders on your machine, not in someone else’s cloud.
- Bring your own agent — 21+ coding agents are supported, including Claude Code, Codex, Cursor, Gemini, OpenCode, and more; you pick which CLI drives generation.
- More than prototypes — websites, prototypes, slide decks, image generation, and even HTML video, all from one workspace.
- Batteries included — 129 built-in design systems and 460+ plugins so you never start from a blank canvas.
If you have used Claude Design, the feel is instantly familiar — Open Design keeps the same calm experience, then adds your choice of model on top.
Step 1 — Choose your agent and model
Download the desktop app from open-design.ai, install it, and answer the short onboarding questions. That drops you into the main chat interface.
At the top right, pick your AI agent provider. For local CLI providers you can choose Claude Code, Codex CLI, Gemini CLI (which has free usage limits), OpenCode, and others. In the demo, Code A Program uses OpenCode with the GLM 5.2 model because it has been strong for front-end work — but the key point is the flexibility: you are not locked into one model or platform.
Step 2 — Write your prompt
The chat has an attach file option for reference material, plus a plugin section. Open Design ships with 460+ plugins covering build and test helpers, 3D mockups, mobile and desktop device frames, and more — so if you need 3D elements or a device shell, you add the plugin rather than fight the prompt.
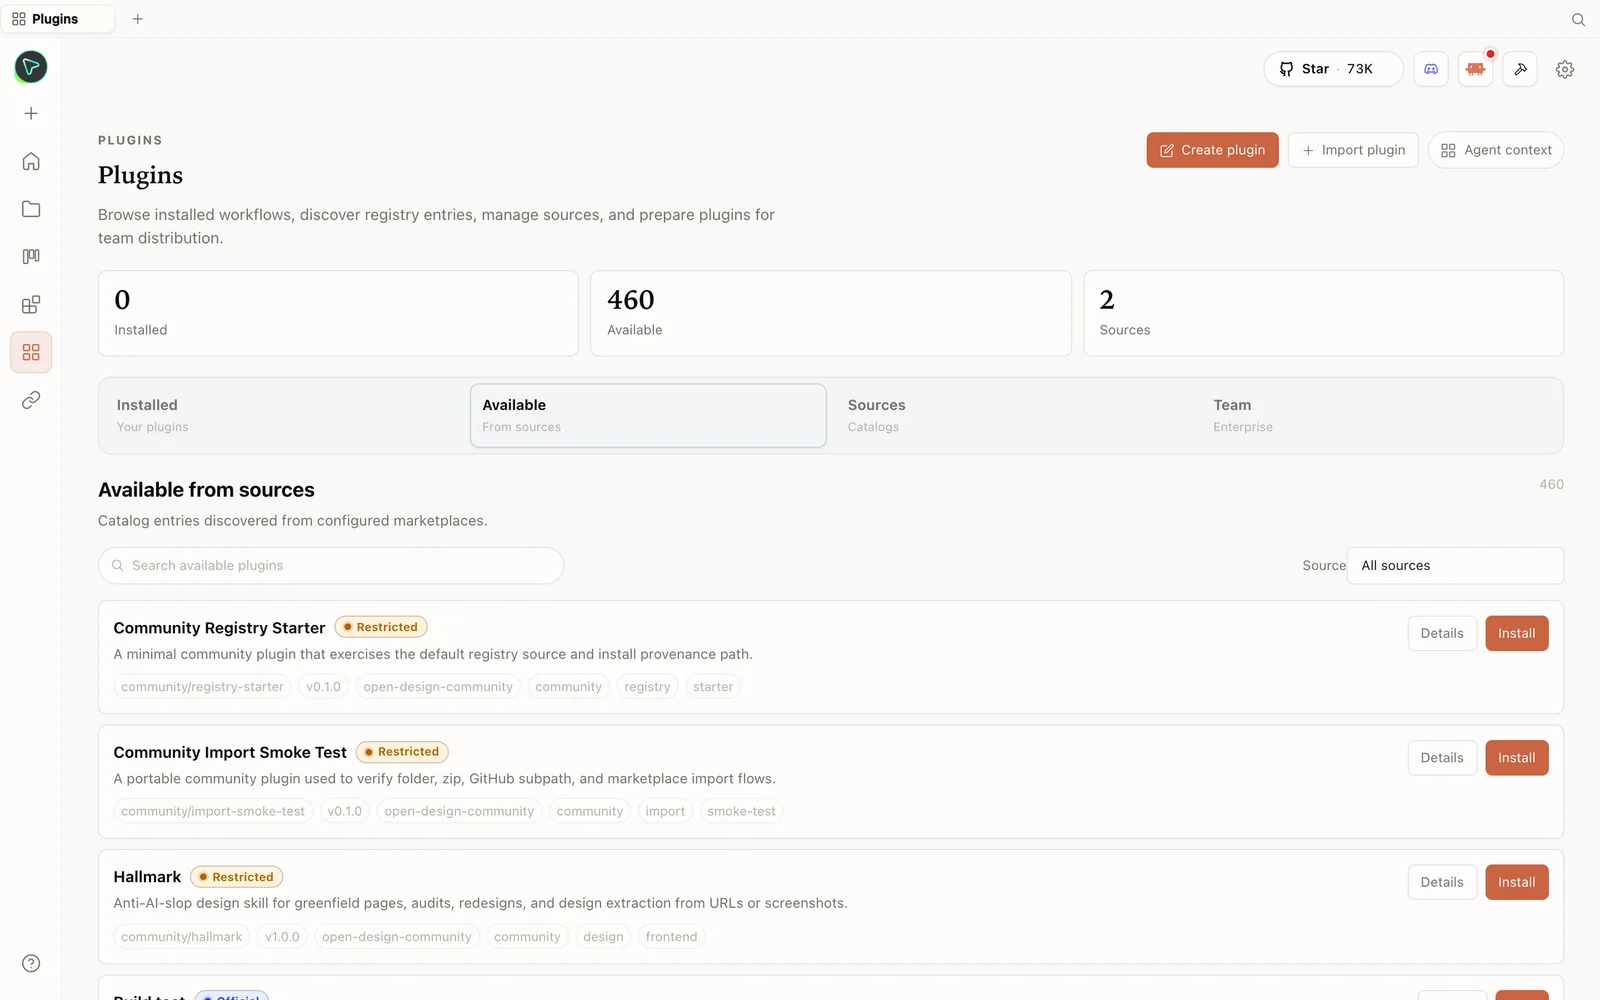 The plugin library: 460+ plugins for building, testing, 3D mockups, device frames, and more — add what your design needs.
Now paste a brief. The demo prompt asks for a premium landing page for an AI writing assistant called Draft, with a restrained slate-black, ivory, and electric-orange palette, a bold editorial hero with a live text-generation animation, an interactive writing canvas, a three-step workflow, a results section, a two-tier pricing table, an FAQ, and a strong final call to action — while explicitly avoiding cards, gradients, glassmorphism, and generic robot imagery.
There is one more lever worth knowing: you can base a design on a popular design system from brands like Apple, Airbnb, BMW, IBM, or Spotify. Code A Program skips it for this run, but it is there when you want to match a specific look.
Step 3 — Watch it build and self-check
Submit the prompt and Open Design starts preparing the project. After about a minute it may ask a few follow-up questions — answer them for better results, or hit skip all and let it continue.
In the demo the landing page itself finishes in about six minutes. Open Design then spends the remaining time running self-checks — verifying the structure, reviewing the layout, checking animations, and fixing small issues before marking the build complete. When it is done, click the present icon to open the site in a new tab.
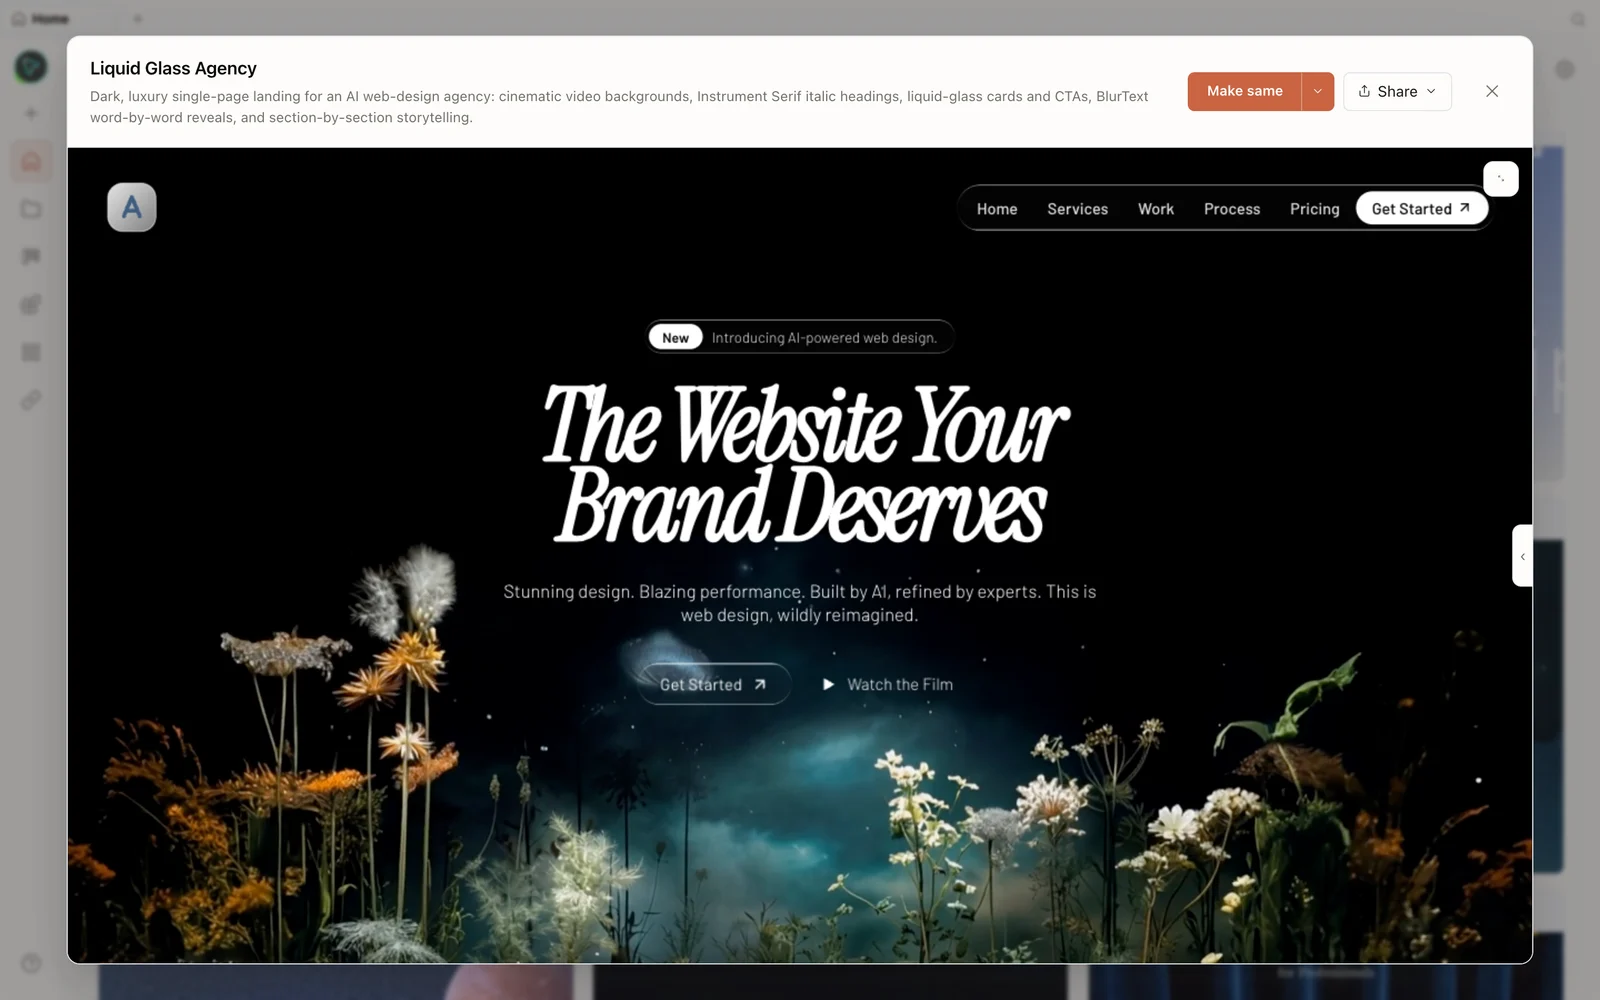 The generated result: an editorial hero with a live typing animation, workflow, results, pricing, FAQ, and footer — responsive across tablet and mobile.
The result carries a hero with an AI-typing animation, smooth scroll effects, an interactive editor section, a workflow strip, a customer-results section, monthly/yearly pricing, an FAQ, and a clean footer. Switch to tablet and mobile views to confirm the responsive design holds up.
Step 4 — Refine with the on-canvas toolbar
The right-side toolbar is where you polish without burning tokens on trivial changes:
- Screenshot — grab an image of the site.
- Comment — select any element (say, the hero heading) and describe a change, such as recoloring one word to the orange theme. Batch several comments and submit them at once, or send one straight to chat.
- Marker — highlight any area of the page and share it with the agent.
- Element edit — directly change fonts, width, colors, and more on a selected element, so simple tweaks never need a full regeneration.
You also get zoom controls and a view of all open comments. In the demo, the “actually” text recolors to orange right there in the toolbar.
Step 5 — Export and deploy
Above the toolbar is the download option — export the project as PDF, image, ZIP, or HTML. There is also save as template, so you can reuse this design as a starting point for future projects.
The share menu is the interesting part. From there you can:
- Deploy to Vercel with one click — connect your Vercel account with an access token and hit deploy.
- Deploy to Cloudflare the same way.
- Open in an editor like Cursor or VS Code, or in CLI tools like Gemini CLI, Codex, and Claude Code. Open Design hands over the generated HTML plus its Skills folder, so you can convert the design into a Next.js project — or any framework you like.
Under settings, you can add global rules (for example, “always use TypeScript”), store useful memories like Claude’s memory feature, and configure media providers — an ElevenLabs key for voice and sound, plus Nano Banana, OpenAI, or OpenRouter for image generation. You can also add skills (there is an agent-browser skill for automating browser tasks, and several front-end skills), wire up MCP servers, and change the default project location.
Tips for getting more out of it
- Free models are enough to start. The entire demo site was generated with a free Gemini tier and still looks great; reach for a paid model when you want higher quality on real work.
- Add plugins before prompting when you know you will need 3D mockups or device frames.
- Use the right tool for the change — the element editor and comments handle small tweaks without a full rebuild.
- Save winning layouts as templates so your next project starts ahead.
FAQ
Is Open Design free? Yes — it is open source under Apache-2.0 and runs locally for free. You only pay for the model/API usage of whichever agent and media providers you connect, and you can use free tiers like Gemini’s.
Which coding agents does it support? 21+ agents, including Claude Code, Codex CLI, Cursor, Gemini CLI, and OpenCode. You pick the provider from the top-right menu.
How is it different from Claude Design? Same familiar feel, but open-source, local-first, and agent-pluggable — you are not locked into one model or platform, and you can export or deploy your project however you want.
Can I deploy without leaving the app? Yes — the share menu deploys to Vercel or Cloudflare in one click (you supply the provider access token), or hands the code to Cursor, VS Code, or a CLI agent.
Do I have to use a paid model for good results? No — for most landing pages and front-end designs, free models are already capable enough; switch to a paid model only when you want more advanced results.
This written guide is based on Code A Program’s demo. Watch the full video above, and subscribe to Code A Program for more hands-on AI-tool videos.